Square tube bending is not round tube bending with corners on it. A round tube resists evenly in every direction; a square or rectangular section does not, and the two walls closest to the neutral axis do almost nothing while the outer walls carry the strain. That asymmetry decides the radius, the tooling and the failure mode before anyone chooses a machine.
Most of the information online about square tube bending comes from two camps: videos of garage builds, and service pages that list what a shop can bend. Neither tells a buyer why a particular radius is impossible, or why two suppliers quote the same part differently. This guide covers the decisions that come first: bend direction, the real radius limit, corner radius, weld seam position and how to specify a part so it can be quoted once.
Why Square Tube Bending Is a Different Job
The section does the work
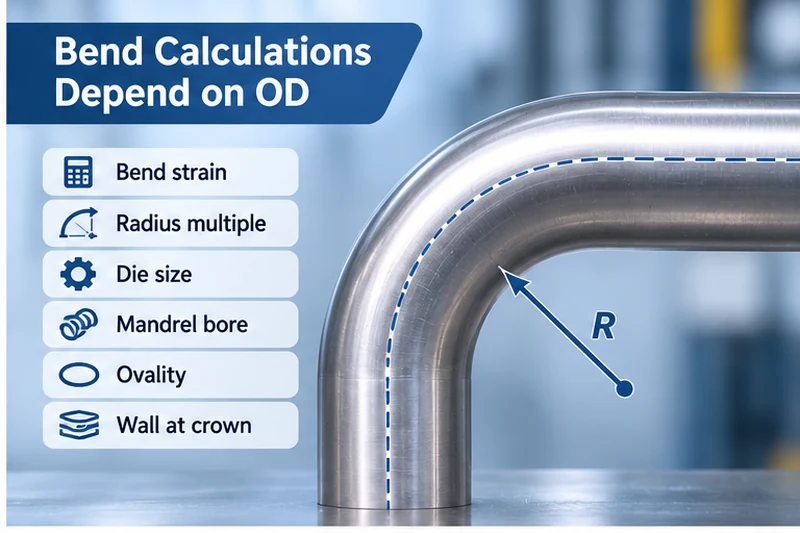
Strain at the outer fibre depends on the dimension in the plane of bending. On round tube that dimension is the diameter. On square tube it is whichever side is being bent through, and that choice is the buyer’s to make or to leave ambiguous.
Ambiguity is expensive here. Two shops can quote the same drawing, one assuming the easy way and the other the hard way, and both be honest. Their prices will differ because the work differs.
What changes when corners appear
A square section has flat walls and radiused corners. Corners stiffen the section, which is good for the part and awkward for the tooling, since a mandrel has to fit an inside that is not round.
That single geometric fact explains most square tube bending problems, including why the weld seam matters more here than on round tube and why a die made for one section will not serve a similar one.
Hard Way or Easy Way: The First Decision
What the two terms mean
Rectangular tube has a wide face and a narrow face. Bending the easy way puts the narrow dimension in the plane of bending, which asks less of the material. Bending the hard way puts the wide dimension in the plane, which asks more.
Force and distortion trade off against each other. Trade guidance states it plainly: bending the hard way requires more force but results in less distortion than the easy way.
Why the difference is large, not cosmetic
Take a 50 mm by 25 mm rectangular tube on a 100 mm centreline radius. Bending the easy way, the dimension in the plane is 25 mm, so the approximate strain is 12.5 ÷ 100, about 12.5 percent. Bending the hard way, the dimension is 50 mm, giving 25 ÷ 100, about 25 percent.
| Case | Dimension in plane | Centreline radius | Approximate strain |
|---|---|---|---|
| Easy way | 25 mm | 100 mm | 12.5% |
| Hard way | 50 mm | 100 mm | 25% |
The same part, the same radius, double the strain. That is why bend direction belongs on the drawing rather than in a conversation.
When the hard way is the right answer
What a sample bend should prove
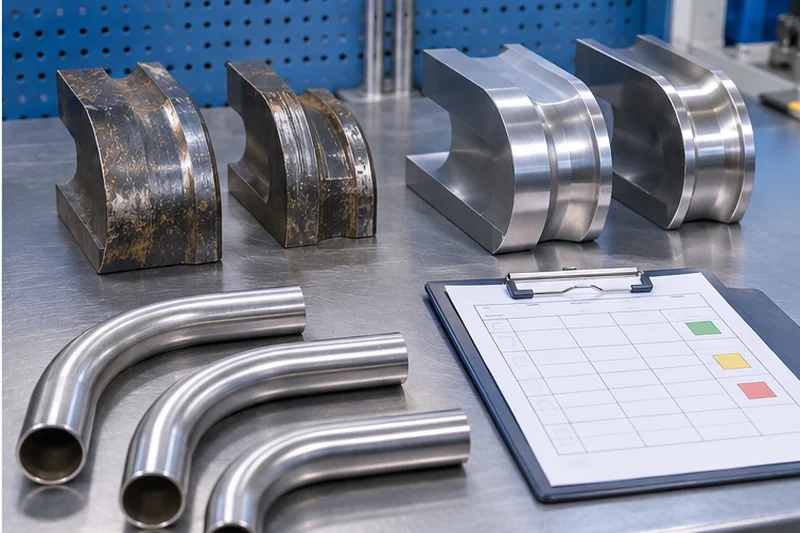
Before a batch, one sample should answer four questions, and a square tube bending supplier should offer it without being asked.
- Whether the die actually fits the section, corner radius included
- Whether the seam was positioned where the bend needs it
- What the inside face did under load, wrinkle or concavity
- Whether the finished part sits flat, which is the test twist fails
Four answers from one part is the cheapest insurance in the process. A supplier who will not bend a sample is asking the buyer to fund the experiment.
Choosing the hard way costs more force and usually more tooling stiffness. It earns that cost when:
- The part is visible on both faces and distortion would show
- The bend sits at the corner of a frame, where flat faces have to stay flat
- The design needs a tighter radius than the easy way allows
- The section is heavily asymmetric, where the easy way produces a pronounced concavity on the inside
Trade guidance adds a useful corollary: on the easy way, the greater the difference between the two sides of the section, the greater the distortion or concavity on the inside of the bend. A 400 mm by 100 mm section distorts more than a 300 mm by 100 mm one. Thicker wall reduces the effect.
What Sets the Minimum Radius
Wall thickness is the strongest lever
Heavier wall bends tighter with less distortion, because there is more material to carry the strain and more to resist collapse. Trade reporting gives a concrete comparison: an 8 inch by 8 inch steel tube bent to a 5 foot radius distorts more at 0.188 inch wall than at 0.500 inch wall.
Those two walls are D/t 42.6 and D/t 16 on the same section. Same radius, same material, very different result.
Reading a die list like a shop
A published die list from a bending shop shows how narrow the real choice often is.
- A 1 inch square tube may be served by dies at several discrete radii rather than a continuous range
- A 2 inch square tube may offer only two radii in stock
- Rectangle dies are sometimes listed as inside radius and sometimes as centreline, in the same table
So “can you bend this” usually means “is one of our dies close enough”, not “can your machine do the arithmetic”. Asking for the die list is faster than asking for a capability statement.
Corner radius and section shape
A sharper corner radius stiffens the section but narrows the space available to the mandrel. Rounded corners can also cause the workpiece to roll in the direction opposite the bend, which shows up as twist rather than as a radius error.
Material condition, including how the tube was made
Tube formed from plate and welded along the corners arrives with work-hardened edges. Trade sources warn that this hardening can cause bending difficulty or cracking at the corner, which is a failure the buyer’s drawing never anticipated.
Seamless or properly annealed stock behaves differently, and that difference is worth confirming before a radius is promised.
Method
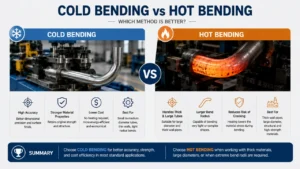
Small material is generally bent by rotary draw or compression bending, where a mandrel and wiper die can support the section. Larger material at a generous radius is more often induction bent or incrementally bent.
Method forms part of the radius limit rather than arriving as an afterthought. A radius that is impossible on a rotary draw machine may be routine for an induction bender, and vice versa.
Corner Radius and Mandrel Fit
The causal chain
A mandrel supports the inside of the bend. On square tube, the inside is bounded by four flat walls and four radiused corners, so the mandrel has to match the corner geometry to sit properly.
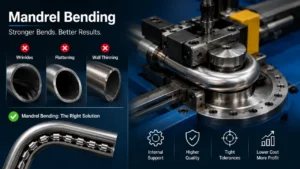
When the corner radius is wrong for the mandrel, three things follow in order: the mandrel does not seat, internal support is lost where it is needed, and the inner wall either wrinkles or the section collapses.
Why this is a drawing problem
Corner radius is set by the tube specification, which the buyer chooses and the mill supplies. If the drawing names the outside dimensions and the wall but not the corner radius, the bender receives a section that may not accept the available tooling, and the problem appears at the first sample rather than at the quote.
Naming the corner radius, or at least confirming it, is cheap insurance.
Weld Seam Position: The Detail That Decides the Part
Where the seam should sit
Trade guidance is specific: the ideal position for the weld seam is the centre of one of the four sides. The closer the seam sits to a radiused corner, the greater the chance of improper mandrel fit and of cracking along the seam.
Where the design permits, placing the seam on the neutral axis of the bent section is better still, because the neutral axis sees the least strain.
Why it matters more on square tube
On round tube the seam can be rotated to almost any position and the section behaves the same. On square tube the seam position interacts with both the corner geometry and the bend direction, which is why a part that ran well in one orientation can fail in another.
A shop that only rotates the seam “out of the way” is not solving the problem. The seam has to be positioned relative to the bend, and that instruction belongs on the drawing or in the purchase order.
How Square Tube Fails: Four Modes
| Failure | What you see | Usual cause | First check |
|---|---|---|---|
| Inner wall wrinkling | Fold or ripple on the inside radius | No wiper die, or mandrel not seated | Mandrel seating and corner fit |
| Section collapse | Walls flatten at the bend | Insufficient internal support | Mandrel size against actual bore |
| Concavity on the inside | Saddle-shaped depression, worst on the easy way | Large difference between sides, thin wall | Bend direction and wall thickness |
| Twist along the part | Section rotates as it leaves the die | Rounded corners rolling against the bend | Corner radius and die grip |
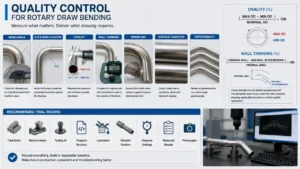
In practice, two of the four are geometry problems rather than process problems, which is why adjusting pressure rarely fixes them. The defect patterns across bending generally are covered in defect triage for bent tubes, and the wrinkling mechanism in tube bending wrinkles.
What the tube’s manufacturing route changes
Two square tubes of identical dimensions can behave differently, and the difference comes from how they were made.
- Tube welded from plate has work-hardened corners, where bending cracks often begin
- Seamless tube has no seam to position, which removes one variable and one risk
- Annealed stock bends further before it cracks, at some cost in strength
None of that is visible on a dimensional drawing, which is why the tube specification belongs alongside the bend specification.
Specifying a Square Tube Bend
The IR / CLR trap
The industry does not use one convention for radius. One supplier’s published die list marks some rectangular dies as inside radius, with the notation IR, and leaves the rest as centreline radius. That is practical for a shop and dangerous for a buyer.
That difference is not small. A die listed at 3.54 inch inside radius on a 1 inch by 1.5 inch tube has a centreline radius of about 4.04 inch once half the section depth is added. Strain computed on 3.54 instead of 4.04 is overstated by roughly 14 percent, which is enough to make a feasible part look marginal.
The rule is short: state which radius you mean, every time.
What a drawing should contain
- Section, with outside dimensions, wall and corner radius
- Bend direction, explicitly easy way or hard way
- Radius, stated as inside or centreline, never bare
- Bend angle and the plane for each bend
- Weld seam position relative to the bend
- Any exposed surface requirement, since AES material is judged differently
A drawing with those six items can be quoted without a phone call, and the quote will match the part you are trying to buy.
How bend direction changes the tooling
Direction is not only a material decision; it changes what the shop has to bolt to the machine.
- The easy way loads the narrow face, so the die contact and clamp grip differ from hard-way work
- The hard way loads the wide face, which usually needs a stiffer clamp arrangement
- A part designed one way and quoted the other may need a different die entirely
- Two identical drawings with opposite directions can carry very different prices
That is why the direction belongs in the drawing title block rather than in an email.
Direction also sets the realistic radius. The same section on the same die carries roughly double the strain one way compared with the other, so a square tube bending job that is comfortable at 12 percent becomes marginal at 25 percent without any change to the drawing dimensions.
A spec sheet that prevents the phone call
Six lines on a one-page spec remove most of the back-and-forth before a square tube bending quote.
- Section: outside dimensions, wall and corner radius
- Direction: easy way or hard way, stated rather than implied
- Radius: inside or centreline, named explicitly
- Angle and plane for each bend
- Seam position relative to the bend
- Surface class, whether the part is exposed or hidden
A supplier receiving those six can quote without guessing, and a buyer receiving the quote can compare it with a competitor’s on the same basis.
Tooling and Method Selection
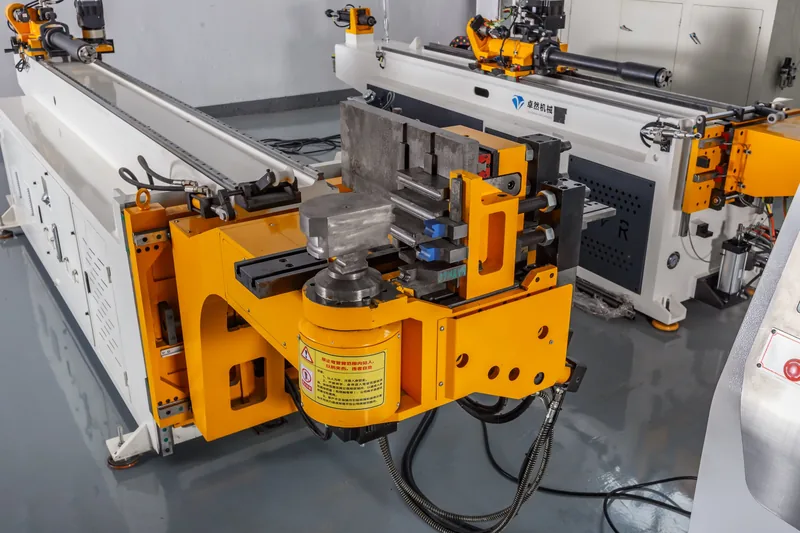
The tooling set
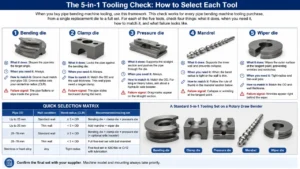
Tooling for square and rectangular sections uses the same family as round work, with the same logic about what each piece does.
- Bend die, sized to the actual section rather than to a nominal size
- Clamp block and follower block, which hold and guide the tube
- Mandrel, matched to the inside geometry including corner radius
- Wiper die, which supports the inner radius where a wrinkle starts
- Lubrication, applied inside and outside, since friction changes both load and surface
Trade guidance notes that all or some of this tooling may be required, depending on the part. A generous radius on thick wall can run with less; a tight radius on thin wall needs the full set.
Choosing the method
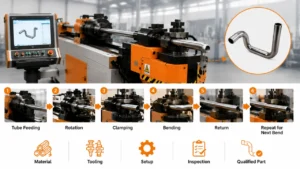
- Small sections at moderate radii: rotary draw, with mandrel and wiper die
- Small sections at generous radii: compression bending can be adequate
- Large sections at generous radii: induction or incremental bending
- Large arcs and hoops: roll bending, which is a different process again
Method follows geometry. A supplier who quotes a method before seeing the section is guessing, and a good square tube bending quote usually arrives with two or three questions attached rather than a number alone.
Decision Matrix: Make It, Buy It or Outsource It
| Situation | Route to evaluate | Why |
|---|---|---|
| A few parts, one radius, visible only from one side | Buy or borrow a bender | Cheapest path, distortion tolerable |
| Repeat part family, radius inside 2.5D | Own machine plus tooling | Setup amortises quickly |
| One-off part at a radius beyond the available die | Subcontract the first run | A specialist already owns the die |
| Large arcs or architectural work | Roll bending specialist | Different process, different supplier |
| Exposed section (AES) with visible faces | Specialist with section control experience | Distortion is the acceptance criterion |
| Section not yet specified | Stop and specify | Corner radius and direction are still open |
That matrix is deliberately blunt about the last row, because square tube bending cannot start until the section is fixed. Buying a machine does not resolve an unspecified section, and no supplier can price a part whose bend direction is undecided.
What AES really demands
Architecturally exposed section work is judged on appearance first, and that reorders the priorities.
- Distortion becomes the acceptance criterion, not a secondary note
- The hard way is often mandatory, because flat faces have to stay flat
- Wall thickness matters more, since thin wall shows concavity sooner
- Sampling matters more, because a cosmetic defect appears in one orientation and not another
Trade guidance puts it plainly: exposed material needs greater analysis of radius, wall and method rather than a standard recipe.
Why square tube twists
Twist is the failure that surprises buyers, because the part can pass a radius check and still be unusable.
- Rounded corners give the section a tendency to roll against the die
- Uneven clamp grip lets one wall lead the other
- A die made for a different corner radius may grip on the corner rather than the flat
A twisted part is a tooling and specification problem far more often than an operator problem.
Manufacturing Quality: Seamed, Seamless and Exposed
Three quality questions come up in every square tube bending project, and each has a different owner.
- Was the tube formed from plate and welded, and are the corners work-hardened as a result
- Is the weld seam where the bend needs it to be
- Is the surface exposed, and does the drawing treat it as AES
Tube specification and mill certificate answer the first. Purchase order answers the second. A drawing answers the third, and it changes the acceptance criteria rather than the process.
Trade guidance treats architecturally exposed section material as requiring greater analysis of bending radius, wall thickness and bending method. That is a polite way of saying an exposed part is judged on appearance, and appearance is where distortion shows first. Tolerance structure for these parts is covered in tube bending tolerances.
Troubleshooting a Square Tube Bend
| Symptom | Likely cause | First check | Usual fix |
|---|---|---|---|
| Wrinkle on the inner radius | Wiper die missing or mispositioned | Wiper contact along the inner radius | Correct the wiper, or fit one |
| Section flattened | Mandrel undersized or not seated | Mandrel fit against corner radius | Match mandrel to the actual inside |
| Twisted part | Rounded corners rolling against the die | Corner radius and clamp grip | Review corner spec and clamp pressure |
| Concave inner face | Easy way bending on a wide section | Bend direction and side ratio | Bend the hard way, or thicken the wall |
| Crack at the corner | Work-hardened corner from tube forming | Tube manufacturing route | Change tube specification |
| Crack along the seam | Seam near a radiused corner | Seam position | Rotate the seam, or reposition it |
Three checks that resolve most of them
- Confirm the bend direction on the drawing rather than assuming it
- Confirm the mandrel seats against the actual corner radius
- Confirm the seam position relative to the bend, not relative to the shop floor
Cost and Lead Time
Square tube bending costs more than round tube bending on the same section, and the reasons are structural.
A die list makes the tooling point concrete. One shop publishes dies for 1 inch square tube at four separate radii, and for 2 inch square tube at two. A part calling for a radius between those available values is either quoted with the nearest die, quoted with a new die, or declined, and which of the three happens depends on the supplier rather than on the drawing.
Prose aside, the arithmetic is simple. Available dies are finite, so a square tube bending project begins with a question about die inventory rather than a question about machine capability.
A shop with 4 dies for 1 inch square tube can serve 4 radii, but only if the wall and bend direction suit each one. That is why a 5 minute conversation about the die list saves a week of samples, and why the answer sometimes arrives as a polite refusal rather than a price.
Three lines decide most square tube bending prices: the die, the setup and the sample. Of the three, only the die is a one-off, which is why a 5 part order and a 500 part order can differ by a factor of 3 in unit price while using the same machine.
- Tooling is section-specific, so a die serves one profile and one radius
- Cycle times are longer, because the section does not flow as readily
- Scrap is more expensive, since a failed bend wastes a part that may already be cut and notched
- Distortion control adds inspection, particularly on exposed parts
Three planning notes follow. Ask for the die cost as a separate line, because it dominates small batches. Confirm the radius convention in writing before accepting a price. And budget a sample bend for any new section, since the corner radius and seam position cannot be verified from a drawing alone.
Answering the DIY question honestly
A buyer asking whether to bend square tube themselves deserves a straight answer rather than a sales pitch.
- For a few parts at a generous radius, a manual bender and acceptance of distortion is a rational choice
- For visible parts, or parts that must assemble, distortion is the whole problem and a bender does not solve it
- For repeat work, the die cost alone usually justifies a supplier who already owns the die
- For anything at a tight radius on thin wall, DIY square tube bending tends to produce scrap rather than parts
None of that is a criticism of DIY work. It is a statement about where distortion becomes the acceptance criterion.
Either way, the same three facts govern the outcome: the direction, the corner radius and the seam. A buyer who knows those three can hold a sensible conversation with any square tube bending supplier, and a buyer who does not will find that every square tube bending quote looks different for reasons nobody explains. None of the three is expensive to settle before a quote, and all three are expensive to discover afterwards.
Frequently Asked Questions
Is square tube bending harder than round?
Yes, for the same outside dimension, wall and radius. The corners stiffen the section, and the flat walls give the mandrel less to grip, so distortion and wrinkling appear earlier.
What is the difference between the hard way and the easy way?
Bending the hard way puts the wide dimension in the plane of bending, which needs more force but produces less distortion. The easy way puts the narrow dimension in the plane and asks less of the material.
How tight a radius can square tube take?
There is no single figure. It depends on the section, the wall, the material condition, the bend direction and the tooling. Calculate the strain from the dimension in the plane of bending, then confirm with a sample.
Should the radius be inside or centreline?
Either is acceptable if it is stated. The industry mixes the two conventions, and some published die lists mark inside radius explicitly while leaving the rest as centreline, so a bare number is ambiguous.
Where should the weld seam go?
At the centre of one of the four sides is the usual recommendation, or on the neutral axis where the design permits. Placing it near a radiused corner raises the risk of poor mandrel fit and seam cracking.
Can I bend square tube without a mandrel?
At a generous radius on thick wall, sometimes. At a tight radius on thin wall, the section collapses or the inner wall wrinkles without internal support.
What is the most common square tube bending mistake?
Leaving the bend direction off the drawing. It is the single item that changes force, distortion, die choice and price at the same time, and it is the item most often left to a phone call. Two suppliers quoting opposite directions are both right, and the buyer cannot tell which quote matches the intent.
Does the corner radius matter?
It decides whether the mandrel seats properly, and it affects whether the section tends to twist. It is a specification item, not a detail.
One paragraph summary
Square tube bending reduces to a short sequence. Choose the bend direction, calculate the strain from the dimension in the plane of bending, confirm the corner radius and seam position, then match the method and tooling to the section. Skip any step and the part gets quoted twice and built wrong once.
For thin-wall sections where collapse is the dominant risk, the thin wall tube bending guide covers the support side in more depth, and pipe bending machine tooling covers how a tooling set is scoped.
Reference Sources
- The Tube & Pipe Journal / The FABRICATOR, Bending square and rectangular tubing — source for hard way versus easy way force and distortion, corner radius and mandrel fit, the workpiece rolling opposite the bend, ideal weld seam position and the neutral axis recommendation, work-hardened corners in shop-fabricated material, the side-ratio effect on easy-way concavity, the 8 inch by 8 inch tube comparison at 0.188 inch and 0.500 inch wall, AES analysis requirements, method guidance for small and large material, the tooling list, and internal and external lubrication. thefabricator.com
- TBC Metalworks, Square and Rectangular Tube Bending — source for rotary draw and CNC mandrel bending ranges of 5/8 inch to 2 inch square and 3/4 inch by 1-1/2 inch to 3 inch by 1-1/2 inch rectangle, roll bending capability, the published die radius examples, and the convention that rectangle radii marked IR are inside radius while all other radii are centreline radius, together with the requirement to state bend direction. tbcmetalworks.com
- Chicago Metal Rolled Products, Rectangular Tube Bending — source for the statement that bending rectangular tubing is more difficult than round tube bending at equal surface area, radius, wall and material. cmrp.com
Related reading on square tube bending: pipe bending machine tooling, tube bending wrinkles, defect triage for bent tubes, tube bending tolerances, rectangular tube bending by pipe vs tube conventions, tube bending machine RFQ checklist.