Bend die wear rarely announces itself, and when it does the announcement is usually a breakdown. A die does not crack on a Tuesday and stop production. It closes the gap between itself and the pressure die by a few thousandths, then a few thousandths more, and the shop answers by adding clamp pressure. Parts still pass. Then one day the pressure die comes in hard enough to lift the bend die along its bending edge, and the machine that was running fine last week is making bearing noise.
That progression is documented in trade reporting, and it is the reason bend die wear belongs in a maintenance plan rather than in a breakdown report. Bend die wear costs the price of a die to put right. Running a die past its life costs a die, a set of bearings, and a week of output.
What Bend Die Wear Really Costs a Shop
A die set is a consumable, and a consumable has a per-piece cost that should be known before it fails.
The cascade nobody budgets for
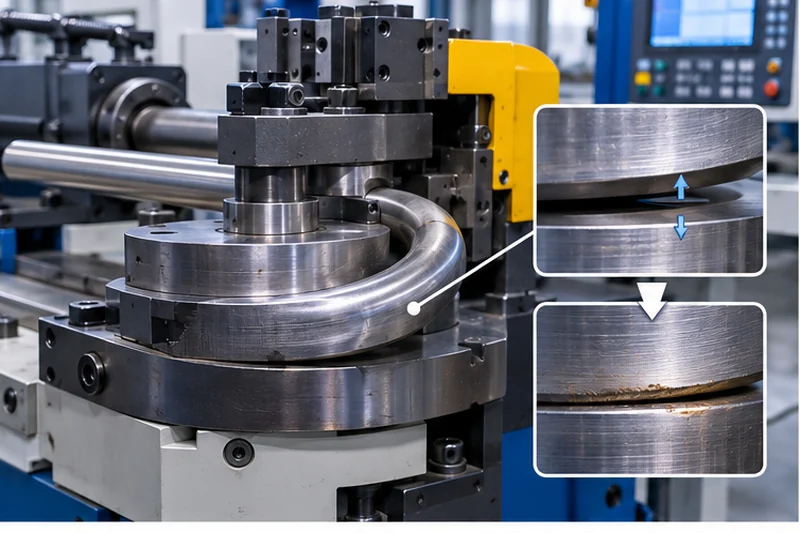
Bend die wear closes the working gap. Closing the gap reduces the pressure die travel available. Operators compensate with more clamp and pressure-die force, because more force still produces a passable part for a while. Eventually the pressure die bottoms out against the bend die, and from that point every additional tonne goes into the tooling rather than the tube.
This is not a theory about worst cases. A reported example describes exactly that end state: no gap remained between the pressure and bend dies, the pressure die lifted the bend die along the bending edge, and the bearing set was destroyed before anyone connected the two events.
Why wear is cheaper than failure
Trade technical guidance frames the economics in one line: a cost-effective bending tool should wear out rather than break. Wear is predictable and can be planned into a weekend. Breakage is not, and tool failure typically becomes process failure — a stopped machine, a missed delivery, an unplanned die order.
That single principle drives most decisions about bend die wear in this article. Choose tooling that fails slowly, measure the slow failure, and replace on evidence rather than on noise.
The Wear Hierarchy: Which Tool Goes First
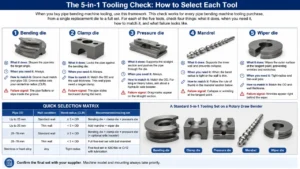
Not every component wears at the same rate, and knowing the order turns a vague inspection into a short list.
| Tool | How it wears | First symptom you notice |
|---|---|---|
| Wiper die | Rubbing contact along the bore, feathered edge dulls or chips | Inner-radius marking, then a wrinkle that was not there before |
| Mandrel balls and links | Rubbing under load, plating or bronze wears through | Ovality creeping up, longitudinal score marks in the bore |
| Pressure die | Sliding contact along the outside of the bend | Required pressure climbing, surface polish turning to pickup |
| Clamp die | Slipping and re-clamping on the same part | Angle scatter within a batch, clamp marks |
| Bend die | Clamping impact plus the bending load itself | Radius drift, then the gap to the pressure die closing |
Wiper dies and mandrels are generally accepted to wear fastest, because they rub directly on the tube rather than merely constrain it. The bend die, by contrast, is built for a long life and usually shows wear last — which is precisely why its wear is the most expensive to discover late.
What shifts the order
Material changes the ranking. Stainless and titanium are harder on bronze contact surfaces, and any abrasive or coated tube accelerates the parts that rub. Tight radii load the mandrel and wiper harder than generous ones. High-volume single-part runs wear one die set quickly, while a job shop spreads the same hours across many sets and sees wear as a calendar problem rather than a cycle-count problem.
How a Bend Die Wears Out Without Breaking
Bend die wear is a slow geometric change, and it has three stages worth naming.
Bend die wear, stage one: the gap closes
Bend die and pressure die work as a pair. As material is lost from the working faces, the clearance between them shrinks. Nothing about the part changes yet, which is why this stage is invisible without measurement.
Bend die wear, stage two: pressure masks it
Operators raise clamp and pressure-die force to keep the part acceptable. The part passes, the machine runs, and the maintenance record says nothing. Trade reporting describes the end of this stage precisely: it takes more and more pressure on the clamp and pressure dies to make a good part.
Bend die wear, stage three: the die lifts and the machine pays
Once the gap is gone, force transfers into the die set. A reported case had the pressure die lift the bend die along the bending edge, with all that pressure applied to the tooling instead of the tubing. What fails next is mechanical — bearings, linkages, or a die that finally cracks — and it arrives as a surprise because parts were fine the day before.
Wiper Die Wear: The Fastest Wearing Tool
Wiper dies earn their keep at the inner radius, where a wrinkle wants to start, and they pay for that contact with their own material.
The feathered edge is the weak point
A wiper’s working edge is deliberately thin, so it follows the tube without gouging. Soft grades of aluminium-bronze or unhardened steel are preferred for exactly this reason: a harder grade keeps its shape longer but its feathered edge becomes brittle and can break away early. A chipped feathered edge shows up as a mark along the inside of the bend, and shortly after as a wrinkle.
Rake extends life, until it cannot
Raking a wiper so it sits at an angle to the bend plane uses less of the bore to control the terminal hump, and that usually lengthens service life. That option disappears on rigid materials, since many stainless steels and hard coppers need full containment at the point of bend, forcing zero-rake and a different feathered-edge geometry.
Debris is a wear multiplier
Soft bronze and steel wipers collect material on the bore. Shops either lubricate heavily or brush the wiper routinely; a hard-chrome plated alloy steel wiper is a documented alternative when neither is practical. Ignoring the build-up turns a slow wear part into a fast one.
When wiper replacement is the answer rather than adjustment, the tooling reference at pipe bending machine tooling covers how the set is scoped, and the wrinkle mechanism itself is in tube bending wrinkles.
Mandrel Wear: Why the Balls and Links Fail First
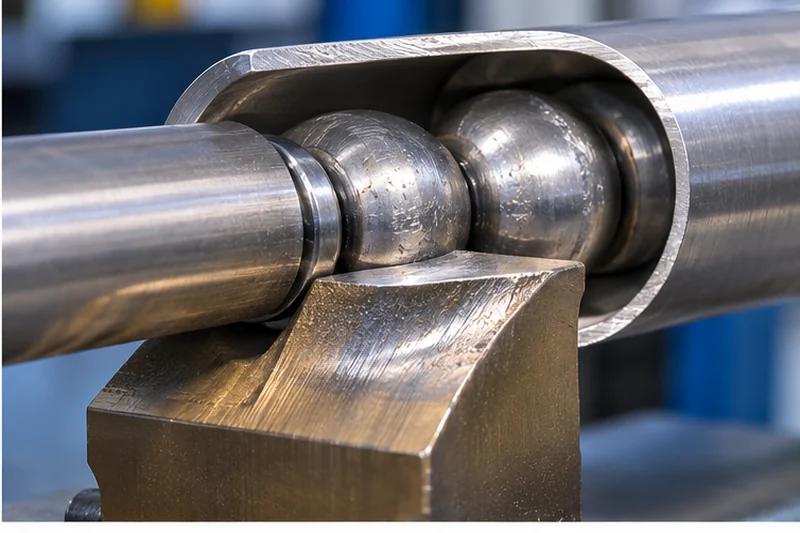
Mandrel wear is usually misdiagnosed as a machine problem, because its first symptom is ovality rather than surface damage.
Nose position decides who does the work
Mandrel noses belong at the point of bend, where they hold the section as the bend starts. When the nose is set back, the balls and links behind it have to do the nose’s work. Technical guidance is blunt about the consequence: that set-up significantly shortens the life of those components.
A common response is buying a coated tool steel mandrel so the balls last longer. That treats the symptom. Moving the nose forward treats the cause, and it costs nothing but a set-up check.
Material choice is not a detail
Aluminium-bronze and hard-chrome plated steel have been the standard mandrel specifications since the modern ball mandrel arrived in the 1950s. Aluminium-bronze is generally preferred for ferrous and titanium tube, hard-chrome steel for aluminium, copper alloys and some mild steel.
Two specification traps shorten life:
- Non-nickel aluminium-bronze instead of the nickel-alloyed grade, when the nickel version can double service life
- Decorative chrome on a case-hardened low-carbon body, instead of industrial hard chrome on a through-hardened alloy steel, which flakes rather than wears
Those are purchasing decisions, not operating ones, and they determine how soon the mandrel joins the wear list.
When to Replace a Bend Die: Six Measurable Signs
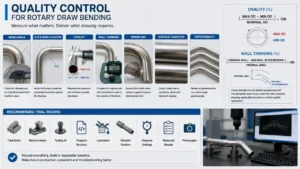
Shops search for when to replace, and the honest answer is that replacement is a measurement decision rather than a calendar one. 6 signs are worth recording against a baseline taken when the tool was new.
| Sign | What to measure | Why it points at wear |
|---|---|---|
| Required clamp pressure rising | Pressure setting at which parts pass | The working gap is closing, so force has to replace geometry |
| Pressure-die gap shrinking | Gap to the bend die at working position | Direct measure of material lost from the faces |
| Angle drift within a batch | Angle spread across 10–20 consecutive parts | Loose clamping and closing gaps show up as scatter |
| Ovality creeping up | Ovality at the crown, same section each time | Internal support is degrading, usually mandrel or balls |
| Inner-radius marking | Visual against a comparison standard | Wiper feathered edge is dulling or chipping |
| Surface pickup on the outside | Visual, then die inspection | Pressure die polish is gone and friction has risen |
As a result, order matters here. Pressure and gap move first and quietly, angle scatter and ovality follow, and surface defects arrive once the damage is visible to the customer.
Take the baseline before you need it
Six numbers to put on the tool record
A tool record earns its keep when it holds numbers someone can compare, rather than a date and a signature.
- The gap between pressure die and bend die, measured at the working position
- The clamp and pressure-die setting at which the first article passed
- Ovality at the crown on that first article
- Angle spread across the first 10 to 20 parts
- Bends produced when the record was taken
- Bends produced when the tool was retired, whenever that happens
6 fields and 5 minutes at first article, and a comparison that no longer depends on memory.
A wear record is only as good as its starting point. Measure the gap, the pressure setting, ovality and angle at first article, write them on the tool record, and compare against those numbers rather than against memory. Without a baseline, every judgement becomes an opinion about whether a part “looks worse than before”.
Decision Matrix: Keep, Regrind or Replace
3 routes exist when a tool is worn, and the choice should follow evidence rather than the calendar.
| Situation | Route to evaluate | What confirms it |
|---|---|---|
| Surface polish gone, gap still in spec | Polish and re-lubricate | Parts recover without changing settings |
| Gap reduced but angle still stable | Regrind the pressure die, re-record the gap | Angle and ovality back inside the drawing |
| Gap gone, die lifting, bearing noise | Replace the set | Any further running risks the machine |
| Wiper feathered edge chipped | Replace the wiper only | Inner-radius marking stops |
| Mandrel scoring or ovality drift | Replace mandrel or balls, check nose position first | Ovality returns to baseline |
| Repeated regrinds on the same set | Replace, and review the set-up | Regrinding is a temporary measure, not a service life |
Regrinding a worn bend die deserves a warning. It restores the working relationship for a while, but it removes material that the next regrind will need. A reported case ended with a shop grinding the pressure die, recognising the tooling had been pushed beyond its usable life, and ordering a complete new set — which is the right ending, but a late one.
Tooling Life and Material Choice
Bend die wear is partly a buying decision, because the material and heat treatment determine whether a tool wears or breaks.
Die set materials
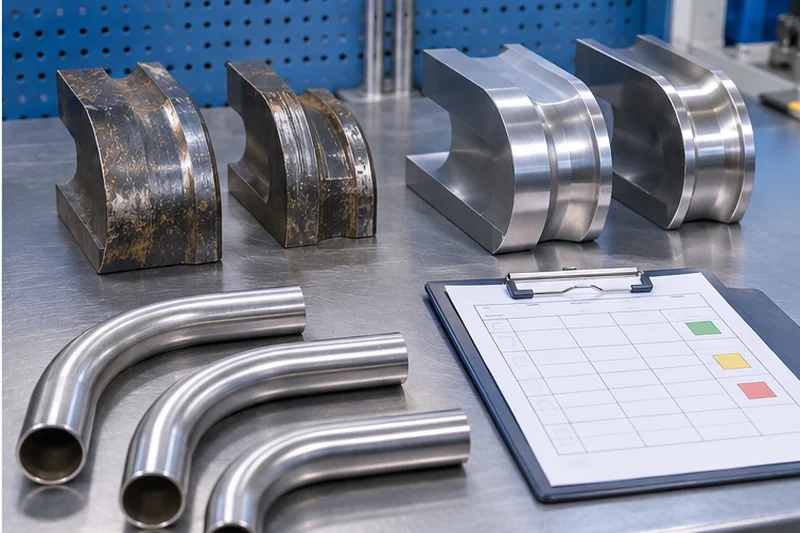
Toughness is the requirement for a bend, clamp or pressure die: hard working surfaces that absorb shock without cracking. Tool steels such as A2, D2 or S7 hold a sharp edge well, which is what metal-cutting wants and what bending does not. Used in a die set they have to be drawn back during heat treatment, giving up the hardness that justified their cost.
Hardened alloy steel, case-hardened by nitriding or carburising, is the documented cost-effective choice for die sets, and it tends to wear out over a long life rather than fail from breakage.
Mandrel and wiper materials
For ferrous and titanium tube the mandrel is normally aluminium-bronze, nickel-alloyed where the size allows, and the wiper is cast in a soft aluminium-bronze. For non-ferrous tube both move to steel: a hard-chrome plated mandrel and a soft steel wiper. The nickel-alloyed bronze grade can double mandrel life, and the softer wiper grade exists because a harder one chips at its feathered edge.
One pattern runs through all of it: contact parts need toughness and a surface that wears, not maximum hardness. Coatings and exotic treatments borrowed from machining rarely pay back on bending tools, because the property they optimise is the one bending does not need.
Set-Up Errors That Cause Premature Bend Die Wear
Most short die life traces back to set-up rather than to the die, and three errors account for most premature bend die wear.
Nose set back from the point of bend
The mandrel nose sits behind the point of bend, so the balls and links carry load they were not designed to carry. Symptoms are premature mandrel wear and rising ovality. Fixing it is a set-up adjustment; the tempting alternative, buying a coated mandrel, hides the cause for another cycle.
Zero-rake wiper where rake was possible
Rigid materials force zero-rake, but applying it everywhere wears the wiper along its full bore instead of a band. If the material allows rake, using it lengthens life.
Wrong material grade for the tube
Non-nickel bronze on titanium, decorative chrome on a mandrel, or a hard wiper on thin-wall aluminium all shorten life in ways that look like operator error. Checking the grade against the tube type at ordering time prevents most of it.
A check that takes ten minutes
- Confirm the nose position against the tool drawing
- Confirm wiper rake against the material, not against the last job
- Confirm the mandrel material grade against the tube type
- Confirm the pressure die sits flat with the gap recorded
- Confirm lubrication is the specified product, applied as specified
How to measure the working gap
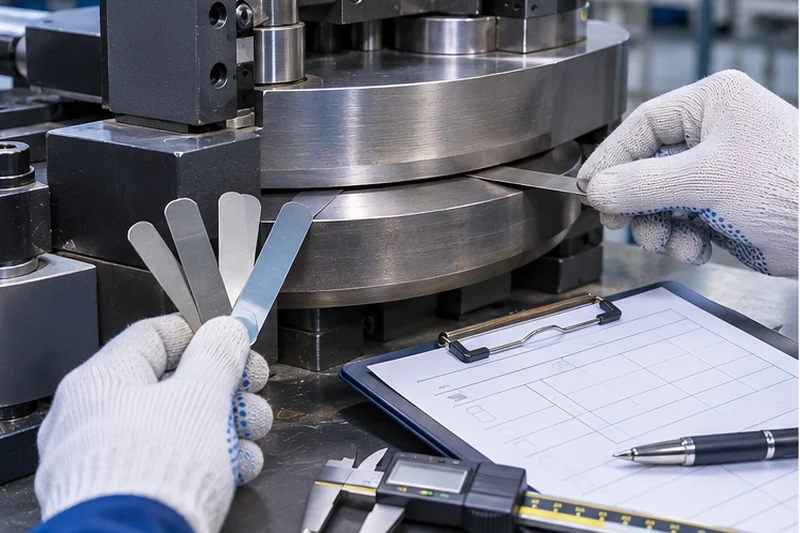
Gap measurement is the least glamorous and most useful bend die wear check in this article.
- Bring the pressure die to its working position with the machine stopped
- Try feeler stock of increasing thickness until it will not enter
- Record the reading against the baseline, not against a target value
- Repeat at 3 points along the die length to catch uneven wear
Uneven readings matter as much as the absolute one, because a die that has worn at one end loads the tube asymmetrically. The same measurement logic sits behind the tolerances in tube bending tolerances.
Troubleshooting Wear Symptoms
Symptom-first diagnosis works here because each wear pattern has a different owner.
| Symptom | Likely wear source | First check | Usual action |
|---|---|---|---|
| Angle scatter within a batch | Clamp die or closing gap | Clamp force and gap measurement | Regrind or replace |
| Ovality rising at the crown | Mandrel balls, or nose set back | Nose position, then ball condition | Reset nose, then replace |
| Inner-radius wrinkle appearing | Wiper feathered edge | Wiper edge under magnification | Replace wiper |
| Surface pickup on the outer wall | Pressure die polish | Die surface under a light | Polish, then regrind |
| Pressure setting climbing run to run | Bend die face wear | Gap to pressure die | Record gap, plan replacement |
| Bearing noise or die lifting | Gap exhausted | Gap and die condition | Stop, replace the set |
Spare parts that keep bend die wear from stopping a shift
Downtime is decided by what sits on the shelf, not by what the catalogue promises.
- 1 spare wiper die per active set, because it is the fastest-wearing component
- 1 spare mandrel or ball set for the tightest-radius family
- The pressure die for the highest-volume part, since it wears next
- Consumables: the specified lubricant, plus the comparison standard for surface work
Hold those four items and you ride out most wear events inside a shift.
Below is an illustrative record for one worn set, not values from any standard. Every shop’s numbers differ; the shape is what to look for.
| Check | When new | Partway through life | Near end of life |
|---|---|---|---|
| Pressure-die gap | 0.10 mm | 0.07 mm | 0.02 mm |
| Clamp pressure setting | 45 bar | 54 bar | 68 bar |
| Ovality at the crown | 2.1% | 2.6% | 3.9% |
| Angle spread over 20 parts | 0.3° | 0.6° | 1.4° |
Record your own four columns and the decision stops being an opinion. A bend die wear pattern that shows up in the first row is still cheap; one that shows up in the last row usually takes bearings with it.
In practice, one discipline keeps this table useful. Measure before you adjust, every time. A pressure increase that “fixes” the part without a measurement is how a worn die becomes a broken machine. The same symptom logic applies to the formed characteristics described in defect triage for bent tubes and to the tolerances in tube bending tolerances.
What short die life actually looks like in the numbers
Two shops can run the same die set and reach very different tooling costs per bend, and the difference is usually set-up rather than material.
- A set that achieves 50,000 bends carries its cost over 50,000 parts
- The same set at 25,000 bends doubles every per-bend figure
- A die that breaks at 20,000 usually costs more than one that wears out at 50,000, because the failure takes machine parts with it
- Set-up errors that shorten life by half are cheaper to fix than any material upgrade
The arithmetic is deliberately simple, because the point is the ratio rather than the decimal places.
Tooling Cost and the Per-Bend Calculation
Tooling life, and therefore bend die wear cost, is an economic number that can be calculated rather than guessed.
per-bend tooling cost = (die cost + changeover hours × shop rate) ÷ bends produced over the tool life
The formula is simple. Inputs are the hard part, because most shops never count bends per tool. Counting them is the single change that turns tooling from a purchase into a managed cost.
A worked illustration, with figures chosen for the arithmetic rather than to represent any particular shop: a die set costing 800 and a changeover of 2 hours at a shop rate of 40 gives 880 of tooling-related cost. Spread over 50,000 bends it is about 0.018 per bend. Halve the life and the number doubles. That is the arithmetic a shop needs when deciding whether a cheaper die is actually cheaper.
Here is the same arithmetic across tool lifetimes, with figures chosen for shape rather than to represent any shop:
| Die and changeover cost | Bends achieved | Tooling cost per bend |
|---|---|---|
| 880 | 20,000 | 0.044 |
| 880 | 50,000 | 0.018 |
| 880 | 100,000 | 0.009 |
| 1,480 | 100,000 | 0.015 |
| 880 | 250,000 | 0.004 |
| 2,200 | 250,000 | 0.009 |
A die at 1,480 that reaches 100,000 bends is cheaper per bend than a die at 880 that reaches 50,000, and neither number is visible without counting. That is the whole argument for putting a bend counter on your tool record.
Three practical notes belong with it:
- Die cost per radius is unavoidable, because one fixed-radius die serves one radius
- Changeover time is a tooling cost, so a set that mounts faster is worth more than its price suggests
- Scrap from a worn die usually exceeds the die cost well before the die is replaced
Budgeting for tooling is covered from the purchasing side in pipe bending machine tooling and the RFQ structure in tube bending machine RFQ checklist.
Signs the machine is worn, not the die
Not every symptom belongs to tooling, and misreading it wastes a die order.
- Repeatable angle error that survives a new die points at machine geometry
- A pressure setting that will not hold points at hydraulics or the pressure-die cylinder
- Vibration or noise at a specific angle points at bearings or the drive
- Scoring that follows the tube, not the die, points at material or lubrication
Test it by fitting a known-good die set. If the symptom disappears, the tooling was the cause; if it follows the part, look at the machine before ordering anything.
What to Record and What to Send
A wear record is short, and it is the difference between planned and unplanned replacement.
- Tool identification: part family, radius, die number
- Baseline at first article: gap, pressure setting, ovality, angle
- Bends produced since the baseline
- The six signs, recorded at each inspection
- Action taken, and whether the part changed
What a supplier needs before quoting a replacement
5 items shorten the loop between a worn die and a working one.
- The part drawing, with the radius and the tube size called out
- The die identification number, so the original geometry can be matched
- The bend count the tool achieved, which tells the supplier what life looked like
- The failure mode: worn out or broken, since the two point at different remedies
- Whether the tube specification changed since the die was made
A supplier told only that a die “wore out” quotes the same die again. A supplier told it wore out at a specific bend count, on a known tube, with a known set-up, can suggest a different grade.
When ordering a replacement, four items keep the quotation accurate: the part drawing, the die identification, the bend count achieved, and the failure mode observed. A supplier who knows the tool wore out rather than broke can recommend a different grade; a supplier told only that a die “wore out” will quote the same die again.
A 5-minute pre-shift check
5 checks at shift start catch most bend die wear before it reaches a part.
- Look at the pressure-die face for polish loss or pickup
- Look at the wiper feathered edge under a light
- Feel the mandrel for scoring, and check the nose sits at the point of bend
- Confirm the pressure and clamp settings match the tool record
- Bend one part and check angle against the first-article value
Done as a routine, those five checks turn tooling from a breakdown item into a scheduled cost.
Frequently Asked Questions
How long does a bend die last?
There is no universal figure. Life depends on the tube material, wall, radius, lubrication, clamping force and how well the set-up supports the tool. A workable approach is recording bends per tool on your own parts, then replacing on measurement rather than on a quoted number.
What is the first sign of bend die wear?
A rising clamp or pressure-die setting needed to keep parts acceptable, with the gap between the pressure die and bend die shrinking. Both are measurable before any part defect appears.
Can a worn bend die be reground?
Often yes, and it buys time. Regrinding removes material the next regrind will need, so it should be treated as a temporary measure with a recorded end point, not as routine maintenance.
Why do wipers and mandrels wear before the bend die?
They rub directly on the tube. A wiper follows the inner radius and a mandrel ball follows the bore, so both see sliding contact, while the bend die mostly constrains. The consequences differ too: a worn wiper marks parts quickly, a worn bend die quietly raises the pressure until something breaks.
Does a harder die last longer?
Not reliably. Toughness matters more than hardness in bending tools, because a brittle die fails instead of wearing, and failure stops the machine. Hardened alloy steel with a case-hardened surface is the documented cost-effective choice.
Can I keep running with more clamp pressure?
Only until the gap is gone. Pressure compensates for lost geometry for a while, then transfers straight into the die set and the machine. That transition is what turns a die replacement into a bearing replacement.
What does it cost per bend?
Compute die cost plus changeover cost, divided by the bends the tool produced. Recording bends per tool is the step most shops are missing, and without it the number stays an estimate.
Reference Sources
- The Tube & Pipe Journal / The FABRICATOR, Why shops should monitor tube bending tool wear closely — source for the closing pressure-die gap, the rising clamp and pressure-die force, the bend die lifting along its bending edge, all force transferring into the die set, and the bearing and breakage consequences. thefabricator.com
- Bend Tooling Inc, Specifying Materials for Tube-Bending Tools — source for the wear-out-rather-than-break principle, die set toughness requirement, tool steel draw-back, case-hardened alloy steel as the cost-effective choice, mandrel and wiper material families, nickel aluminium-bronze doubling life, industrial versus decorative chrome, and wiper rake and zero-rake behaviour. bendtooling.com
- Tube Form Solutions, The 5 Basic Bending Tooling Components Explained — source for the observation that mandrels and wiper dies wear fastest because they rub on the tube. tubeformsolutions.com
- Omni-X, Bend Die — definition and function of the bend die in a rotary-draw set. omni-x.com
Related reading on bend die wear: pipe bending machine tooling, mandrel bending technology, tube bending wrinkles, ovality in bent tube, defect triage for bent tubes, tube bending tolerances.